This Vegan Peanut Butter Cake recipe has been tweaked and amended so many times… Mostly because I like tweaking with recipes but also to keep improving, making it taste better and easier to make. It tastes great, is sweet (without refined sugar), is packed with healthy protein, and is a HUGE hit with kids 🙂
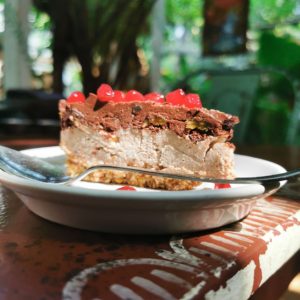
It makes about 12 generous slices of super creamy peanut butter cake when made in a 20cm diameter cake mould.
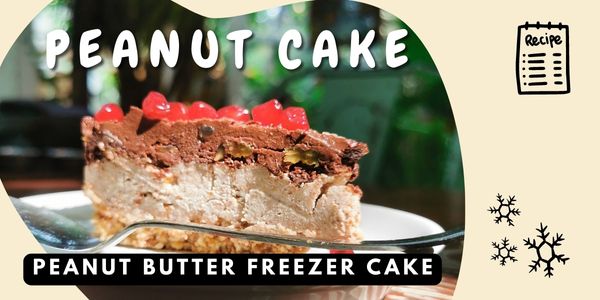
Vegan Peanut Butter Cake Recipe
Vegan. No Dairy, No Egg & Refined Sugar FREE
Ingredients:
The quantity you need of each ingredients can vary… its about consistency of the mixture so you should use the measures below as a guide only.
Base Layer:
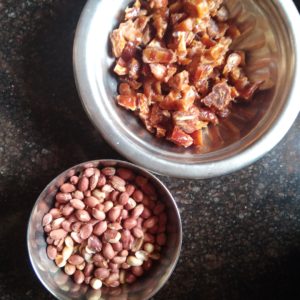
- 195g Toasted Peanuts
- 61g Dates (approx 10x Dates) – Dried, deseeded and NOT sugar coated
- Pinch Pink Salt
- 12g (2x dsp) Cold Pressed Virgin Coconut Oil
Smoothie Cream Layer:
- 220g (+40g possibly) Coconut Cream (Homemade is BEST)
- 280g Peanut Butter (made from 2x Cups of Toasted Peanuts)
- 61g Dates (approx 10x Dates) – Dried, deseeded and NOT sugar coated
- 61g (1/2 Cup) Cold Pressed Virgin Coconut Oil
Chocolate Icing Layer:
- 150g Raisins (washed and squeezed)
- 30g Cacao Powder
- 30g (4x dsp) Cold Pressed Virgin Coconut Oil

Methodology: Vegan Peanut Butter Cake
Choosing the Right Kitchen Tech can be important. I would use the small Metal Grinder Jug for making the peanut butter, base and chocolate icing. Otherwise a Food Processor would be best to use for these layers, although if you have a high power blender just go for it.
And for the Smoothie Cream Layer (and the Homemade Coconut Cream) I would use a Blender Jug.
Usually I start with the Peanut Butter…
Peanut Butter:
- Check Peanuts for stones etc…
- If Raw, toast/roast the peanuts in an oven at about 180 degrees for 30-40 minutes… Allow to fully cool afterwards.
- Place Peanuts in the Grinder/Food Processor and add a pinch of pink salt.
- Grind until the peanuts are a smooth paste… This may require stopping to use a spatula to get the grinding nuts into the center and within reach of the blades… It might take awhile depending on your tech.
- If the mixture is not turning into a paste… Add a little of the Coconut Oil for the Smoothie Layer into the peanuts… This will help the nuts to start blending into a paste.
- Remove the Peanut Butter and set aside.
Base Layer:
- In the Grinder/Food Processor add the 195g peanuts, 61g chopped dates and pinch of pink salt.
- Grind them until the dates are tiny pieces and the nuts are still crunchy but small.
- Add 12g Coconut Oil and briefly mix.
- Empty your Base Mix into your mould (typically I use a round tupperwear box 20cm diameter and 5cm deep). But a tuppaware box of a similar volume works well too.
- Spread it out evenly across the base of your mould and then press down with the back of spoon (or clean fingers)… To compact the Base Mix into the bottom of the mould.
- Cover and put the Base into the Freezer while you make the Smoothie Layer.
Smoothie Cream Layer:
- In a BLENDER add the 220g Coconut Cream, 280g Peanut Butter, 61g Chopped Dates, 61g Coconut Oil and BLEND until smooth… To get it totally smooth might take awhile depending on your tech, a few date pieces can be nice in a mainly smooth Cream Layer.
- Pour the Smoothie Cream Layer onto the Base Layer, use the back of a spoon to flatten and smooth the surface of the Smoothie Layer.
- Cover and put the Base & Smoothie Cream Layers back in the Freezer.
- Leave to FREEZE for at least an hour… Best left overnight to let the Smoothie Layer completely set/freeze before adding the Chocolate Icing Layer of the completed Peanut Butter Cake.
Chocolate Icing Layer:
- In the Small Grinder (or in a Blender) add 150g washed Raisins (gently squeezed of excess water), 30g Cacao Powder and 30g Coconut Oil… AND BLEND until it is a smooth(ish) paste.
- If the raisins are not blending try adding a little more oil, if you are using a big Blender Jug and it’s too big for the quantity of ingredients… Try making double the quantity and putting half aside as a sweet chocolate spread.
- Once you have a smooth(ish) Chocolate Raisin Paste add this to the top of the hard SET Smoothie Layer and use the back of a spoon to flatten and smooth the surface of the Chocolate Icing Layer.
- Cover and put the Base & Smoothie Cream & Chocolate Icing Layers back in the Freezer.
- Leave to FREEZE for at least an hour… Its best to leave it to fully set/freeze overnight before taking your completed Peanut Butter Cake out of its mould.
Removing the Vegan Peanut Butter Cake from mould:
- Once the Peanut Butter Cake is completely set. Take it out of the freezer and let it sit a few minutes on the side. If using a silicon mould, simply peal the mould from the cake and place on a chopping board.
- If you used a cake tin or tupperwear box mould, carefully cut around the edge of the cake helping to free it from the edges of the mould…
- Then with a plate over the top of the cake (and a chopping board ready on the worktop) and turn the cake upside down… it should pop out onto your plate… When it does put the chopping board across the Base of the Cake… and turn it the right way up… So now the cake is out of the mould, the right way up on the chopping board… If it doesn’t pop out of the mould easily… Try giving the tin/box a gentle flex and tap the base.
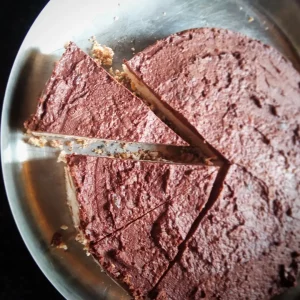
- Now for cutting your Vegan Peanut Butter Cake… Using a sharp knife and wiping it on a clean cloth between each cut… Cut the cake into about 10-12 generous wedges.
- If you are using a silicon mould, depending on your mould… You should be able to carefully peel the sides of the mould away and get the cake out that way.